A midi controller to preform on with pure data. Making a copmuter insrutament basically.
It outputs MIDI (values 0-127) and serial (values 0-1023) using the dropdown in the Arduino IDE.
One for convienynce, the other for precision.
I've put all the code down at the bottom
here's the order i made from tayda electronics. not too expensive.
8		$3.92		Chicken Head Black Knob
8		$3.92		Chicken Head Cream Knob
13		$6.50		5K OHM Linear Taper Potentiometer Solder Lugs Round Shaft Dia: 6.35mm
1		$0.15		40 Pin 2.54mm Single Row Pin Header Strip
		$3.99		shipping
1		$21.29	Teensy micro controller
		$7.47		wood glue
		$7.24		screws and rubber feet
--------------------------
		$54.47	Total
The 2mm plywood was somthing i had from a previous project.
Alright now down to how it was done.
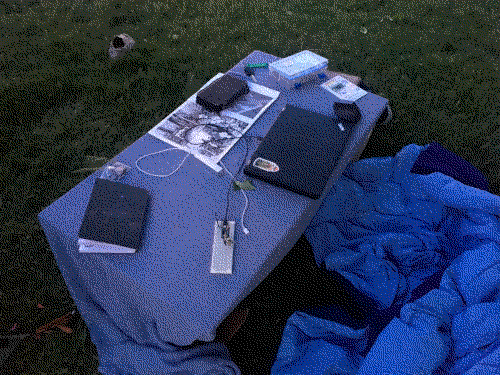
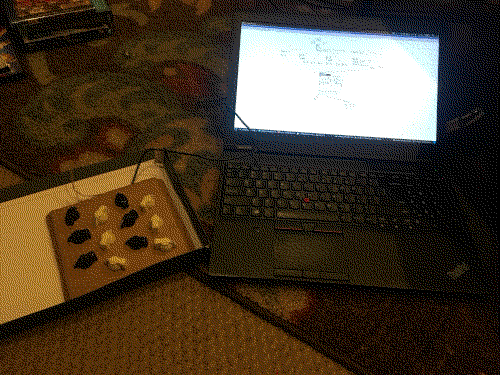
Here's me workin on it outside, making sure the idea all works on a bread board.
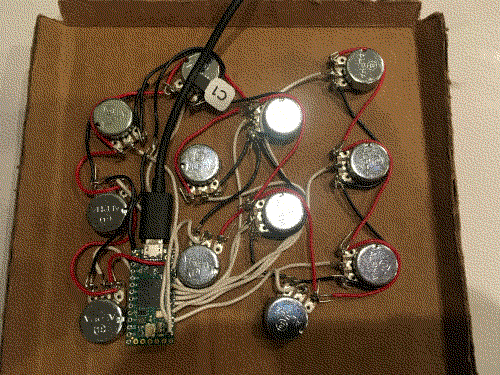
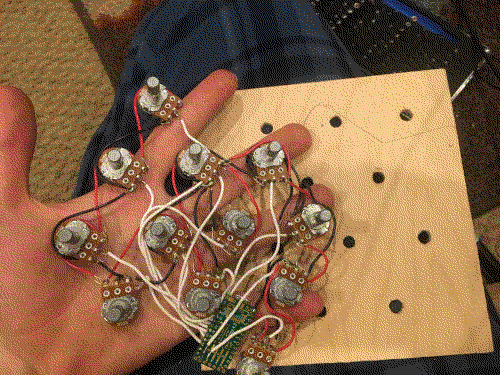
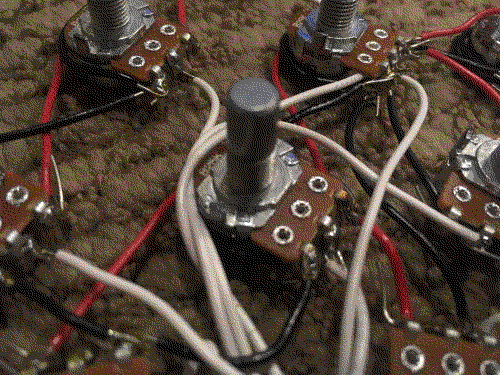
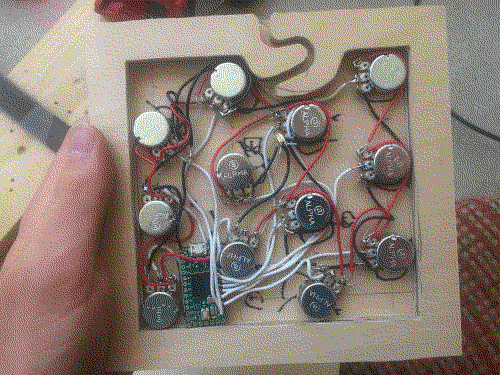
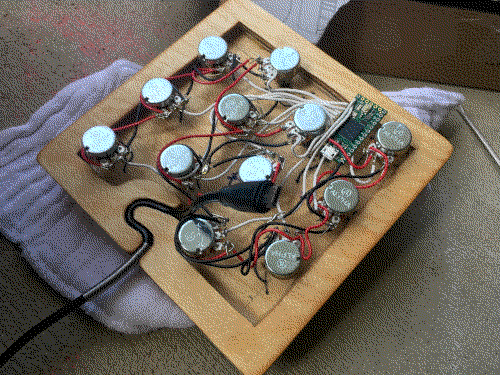
All the wiring is just spigetti.
When looking at the potentiometer from the back, the wiring is like so...
left pin 	: BLACK - ground
middle pin 	: WHITE - routed to one of the anolog inputs on the teensy
right pin	: RED - +3.5 volts
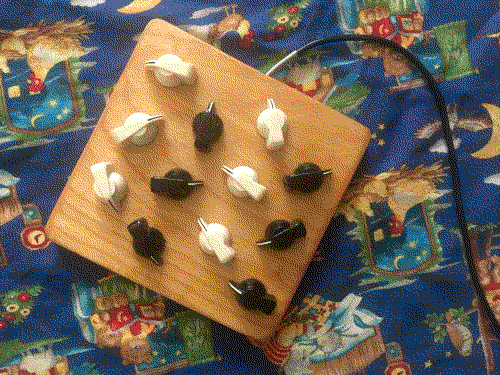
Looks nice with the chiken head knobs. I choose chiken head chause i heard that they are very sesitive (because of radius) and easy to play. You can flick and spin them.
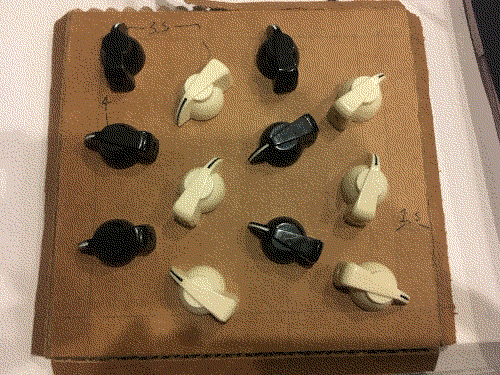
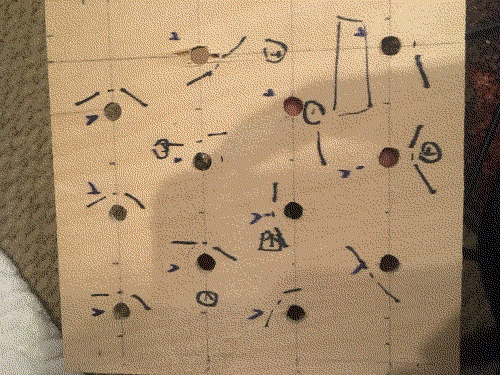
Did a cardboard test of the body of the controller. Each knob is 4cm apart. I found this gestemation worked great. (yo check that out you can see the messurements in the picture :o )
More testing with the computer.
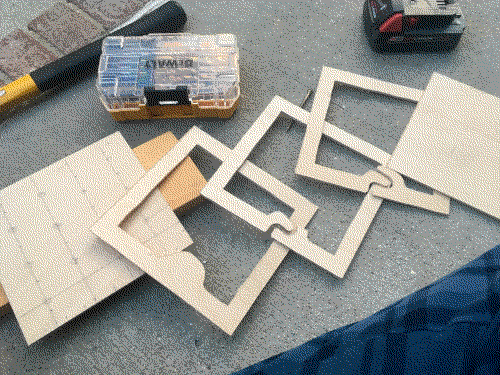
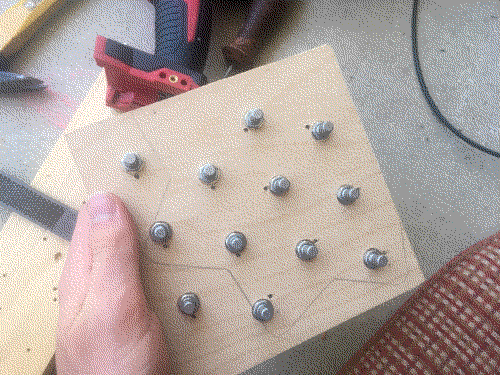
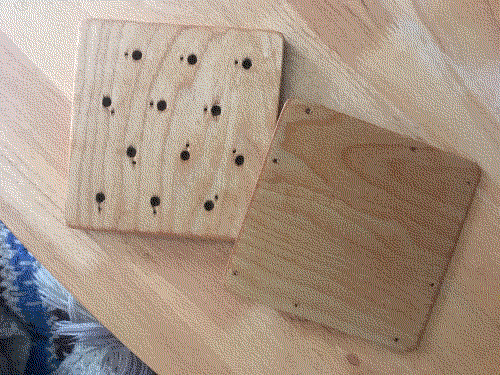
Here I start working on the case. You can see here how the device will go together. These are pieces of 2mm plywood cut out with a table jigsaw. My grandpa has an epic wood working shop. This would have been much harder without that tool.
Now i just fit the wires to the new face plate.
Theres these pins on the pots so that they don't spin in the socket. To find the corect placement for these small holes i used a black sharpie to transfer the position of the pin.
And there we go it all fits.
I don't have any pictures of the glueing process, but it was pasically just a bunch of clamps. When it dryed though, one of the edges was bent. So i let soke for somthing like 10 minutes in hot water...
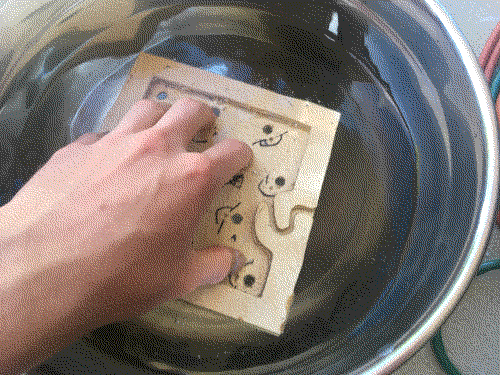
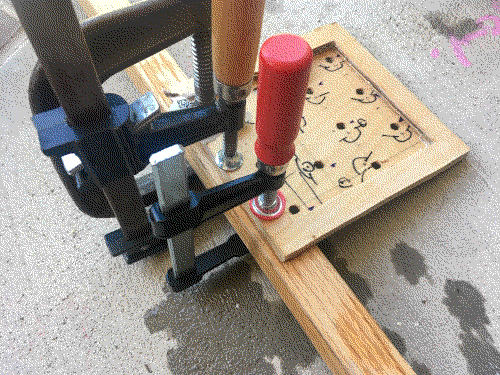
Then clamped the edge against a piece of wood to straiten it out.
Next step was finishing it. (no pictures again) Mix 50% Hope's Pure Tung oil and 50% mineral spirits in a glass bowl or jar. Slather it on with an old piece of cloth. Wait 30 min and then wipe exsess of with a paper towel. Wait 12 hours than do a second layer. Wait 48 hours for full cure. This keeps the wood from splintering and becoming rough when exposed to the oils of human hands.
Here you can see how the stress releaf curve fits the usb cable. If the cable is yanked on it won't budge.
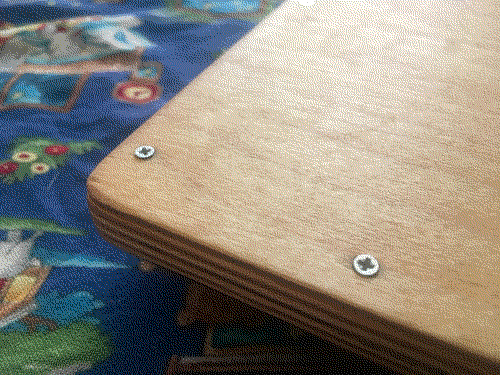
Used some small wood screws to hold the back plate on (to replace the cable or fix something if it stops working). Pre-drilling screw holes is a very important step.
And there we go! So far its been used to play pure data, no recorded music made with it yet.
Here's the code that's on the teensy right now. Has anit-flicker and everyhting.
void setup()
{
  Serial.begin(9600);
  pinMode(0, OUTPUT);
}


#define sgn(x) ((x) < 0 ? -1 : ((x) > 0 ? 1 : 0))


int old_high_grain_values[13];
int old_low_grain_values[13];
int map_i[] = {5,4,6,7,8,2,1,3,9,0,10,12};

const int low_grain_anti_flicker_spacing = 1;
const int high_grain_anti_flicker_spacing = 3;


void loop()
{
  analogWrite(00, analogRead(A0) / 2);

  for (int i = 0; i < 12; i ++) {
    int high_grain_value = analogRead(A0 + map_i[i]);
    int low_grain_value = high_grain_value / 8;

    int anti_flicker_spacing_max = old_low_grain_values[i] + low_grain_anti_flicker_spacing;
    if (low_grain_value < old_low_grain_values[i] || low_grain_value > anti_flicker_spacing_max) {
      if (low_grain_value > anti_flicker_spacing_max) {
        old_low_grain_values[i] = low_grain_value - low_grain_anti_flicker_spacing;
      } else {
        old_low_grain_values[i] = low_grain_value;
      }
      usbMIDI.sendControlChange(i, low_grain_value, 0);
    }

    anti_flicker_spacing_max = old_high_grain_values[i] + high_grain_anti_flicker_spacing;
    if (high_grain_value < old_high_grain_values[i] || high_grain_value > anti_flicker_spacing_max) {
      if (high_grain_value > anti_flicker_spacing_max) {
        old_high_grain_values[i] = high_grain_value - high_grain_anti_flicker_spacing;
      } else {
        old_high_grain_values[i] = high_grain_value;
      }
      Serial.print(i);
      Serial.print(" ");
      Serial.print(high_grain_value);
      Serial.println();
    }
  }

  while (usbMIDI.read()) {
  } // keeps the midi que from getting stupid large
}